If you’re wondering how to heal a herniated disc quickly, then some targeted exercises are likely the answer. While it’s true that sometimes a herniated disc may resolve on its own, this is not always the case. Many of us try to struggle through the pain until we hit a point where we realize we need to actually do something to get better.
A herniated disc is perhaps the most common assumption when someone mentions they are having symptoms of sciatica. When these symptoms arise from a disc issue, this is commonly referred to as radiculopathy. The good news is that many of these people who develop pain and weakness from a herniated disc will improve over time with conservative care, such as physical therapy. (1)
What is a herniated disc?
A spinal disc is cushion-like cartilage positioned between two vertebrae. A major role is to protect the spinal cord and the spinal nerves as they exit and travel to our arms and legs. Discs are meant to be flexible and adaptable to allow for mobility and stability in the lumbar spine. The disc is generally thought of in two different regions: the outer material of a disc and the inner layer. The outer layer is known as the annulus fibrosis and is made of up collagen fibers, which helps provide structure and support for the disc. The inner layer is known as the nucleus pulposus and is more of a hydrated gelatinous structure. Generally, when we think of a disc herniation, the outer layer can experience a tear and the inner, gelatinous portion can “leak” and that is what is seen on an MRI as a herniated disc.
Herniated disc symptoms
When a disc herniates, it often has no effect on our system. However, when that herniation begins to press on the nerves the disc is meant to protect, it typically manifests as pain, tightness, numbness, weakness, or even tingling in the low back, legs, and feet. When these symptoms begin, it may progress to many other symptoms.
- Limping, wobbling, when walking, and even short, wide steps
- Pain with sneezing and coughing
- Feeling “stuck” in a position and being unable to sit up straight
- Struggling to get up from a chair or out of your vehicle
- Pain in the first ~30 minutes after getting up in the morning.
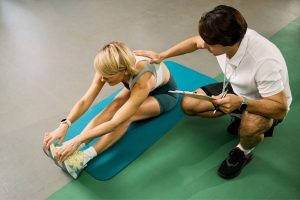
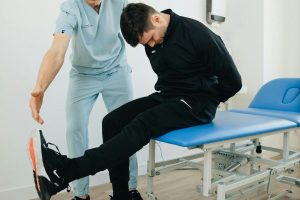
If a disc is causing pain and discomfort, it is important to get to physical therapy quickly. Through a subjective interview of what symptoms are occurring and objective testing, you can begin to get on the right track. In most cases, conservative care such as physical therapy is all you need to recover. In fact, it has better outcomes than opioid prescriptions and even surgery!
Treatment time varies from patient to patient, but a patient should see results in 6-8 weeks. By seeing a physical therapist, they will be instructed on proper posture, pain management techniques, and stretching/strengthening exercises relevant to their individual limitations. More importantly, a good physical therapy program should also include a learning a home program where a patient will be able to take what they have learned and implement them long after they need physical therapy.
Home exercises for a herniated disk
After you have a flare up in your low back, the question always arises, “What can I do to help the pain?!” There are a few simple exercises that can be performed with no equipment at all. All of these exercises are typically instructed to move within a tolerance range. That means if you can only move through 50% of the movement before sharp pain increases, then you do the exercises at the tolerable range. Over time, that range should be able to improve.
Exercise 1: Prone with pillow underneath

Lie face down with a pillow under your pelvis, your arms beside your body and your head rested on your hands or turned to one side. Take a few deep breaths and relax in this position, focusing on removing the tension from the muscles in your lower back. Stay in this position for 5-10 deep breaths.
Exercise 2: Prone on Elbows (Sphinx Pose)

Begin by laying on your belly. Place your forearms on the mat with the elbows directly under your shoulders. Arms are parallel with each other. On an inhale, gently begin to lift your chest and upper torso off the floor into a mild bending of your back. Lift the belly in and up to support the lower spine. Hold for 5-10 breaths and then gently lower back down to the floor
Exercise 3: Prone Press Up
Lie face down with your arms beside your body and your head turned to one side. Bring your arms up and place your hands under your shoulders. Straighten your elbows and push your top half up as far as pain permits. Remember to keep the pelvis, hips, and legs limp and allow your lower back to sag. Hold for 1-2 seconds and lower to starting position. Try to raise yourself up a bit further with each repetition. Do this for 2-3 minutes.
Exercise 4: Prone alternating arm/leg lift
Lie flat on your stomach with your arms straight over your head. Begin by tightening your abdominal muscles. While holding this contraction and keeping your back flat, slowly raise your opposite arm and leg (e.g. left arm and right leg). Lower to starting position, and repeat with opposite arm/leg (e.g. right arm and left leg). Do this for 2-3 minutes.
Exercise 5: Scorpion
Lay on your stomach and chest with your arms out to the side. Lift your right leg and touch the ground on the left side of the body. When you do this, your hips will lift off the ground. Be careful to not use momentum with this movement and remain in control the entire time. Repeat for 10-15 repetitions.
Exercise 6: Cat/Cow (Cat/Camel)
Begin on your hands and knees with your hands below your shoulders and your knees below your hips. Arch the upper portion of your back as much as you can while bringing your head toward your chest. Return to starting position, and immediately arch the lower portion of your spine so that your stomach comes toward the floor while simultaneously raising your head. Do this for 2-3 minutes.
Exercise 7: Bird Dog
Begin on your hands and knees with your hands below your shoulders and your knees below your hips. Maintain neutral spine with abdominals drawn upward. Inhale to prepare, then exhale as you lift an opposite arm and leg up. Alternate limbs and continue for 2-3 minutes.
Exercise 8: Lower Trunk Rotations:
Lie on back with knees bent and feet flat on floor. Keeping your back flat on the ground, bring your knees downward toward one side until you feel a light stretch in your lower back. Return to the starting position and then repeat toward the opposite side. Do this for 2-3 minutes.
Exercise 9: Piriformis Stretch:
Lying on your back with your knees bent and feet flat on the floor, cross the leg you intend to stretch across your other leg keeping your ankle at your knee. Place both hands behind the thigh of your uncrossed leg and gently pull your knee towards your chest, feeling a stretch in the buttocks of your crossed leg. Hold for 10-15 seconds. Repeat for 5 repetitions.
Exercise 10: Sciatic Nerve Glides
Lie on your back with both feet straight out. Lift the leg to be stretched so that the hip is bent to 90 degrees (right angle) keeping the knee and ankle relaxed. Grasp the back of the thigh with both hands. Pull your toes towards your nose. Slowly straighten the knee as much as you can. Once you cannot straighten the leg any further, point your toes toward the ceiling, then back towards your nose. Then move back to the starting position. Do this for 2-3 minutes.
Exercise 11: Bridging
Begin by lying with knees bent and both feet placed on the floor with arms at your sides. Tighten your abdominals by drawing your belly button in toward your spine. Keeping the stomach tight, raise your hips off the surface by squeezing your gluteal muscles. Attempt to bring the hips up as far as you can while maintaining the abdominal contraction. Return to starting position. Do this for 2-3 minutes.
Exercise 12: Standing Thoracic Extensions
Starting Position: Begin standing with both hands resting on a wall with your arms straight. Movement: Keeping your hands in the same place, slowly drop your chest to the ground with feet remaining flat on the ground to get a stretch across your shoulders and even down the hamstrings. Return to starting position. Do this for 10-15 repetitions.
Exercise 13: Plank
Begin by lying on your stomach with both forearms under your chest. Keeping your abdominals tight, push up through your forearms so that your chest, hips, and knees are off the ground. You should be able to draw a straight line from your ankles, through your hips to your shoulders. Hold as long as you can until you begin to lose your form.
In Conclusion
As mentioned above, if you have a herniated disc that is causing pain, seeking physical therapy is one of the first things that may help. However, we do encourage you to try some of these exercises in the meantime. Who knows, you may experience relief on your own! If you have any questions or would like to set a time for a consultation, please reach out to us.
Good luck, and let us know how it goes for you!
1. Akuthota V, , Marshall B, , Boimbo S, , et al.. Clinical course of motor deficits from lumbosacral radiculopathy due to disk herniation. PM R. 2019; 11: 807– 814.