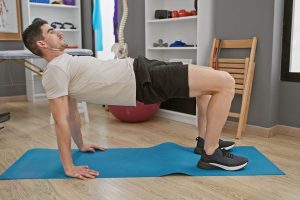
Shoulder pain is one of the more common forms of pain that we experience, behind low back pain and neck pain. It is common to develop some pain over time, as we are all used to spending quite a lot of time in a hunched over position in front of a computer these days.
This is the second blog post in a series on shoulder pain. If you’re not sure what’s causing your shoulder pain, you may want to go back and read the first part, how to assess what’s causing your shoulder pain. If you’re already up to date, and you’re ready to recover, then read on!
You can always treat some shoulder injuries with rest and ice. Be careful to not lay on your shoulder or with arms overhead. You might also begin to perform some exercises to increase the circulation of vulnerable tissue and to decrease your pain.
Here is a quick 10-15 minute shoulder rehab / prehab DIY physical therapy routine that can be done 2-4 times per week. Repeat all exercises for three sets of 15 repetitions, and repeat all stretches for three 15 second holds. If you miss a session, don’t be too hard on yourself. Just pick up where you left off next time!
Shoulder/scapula elevation
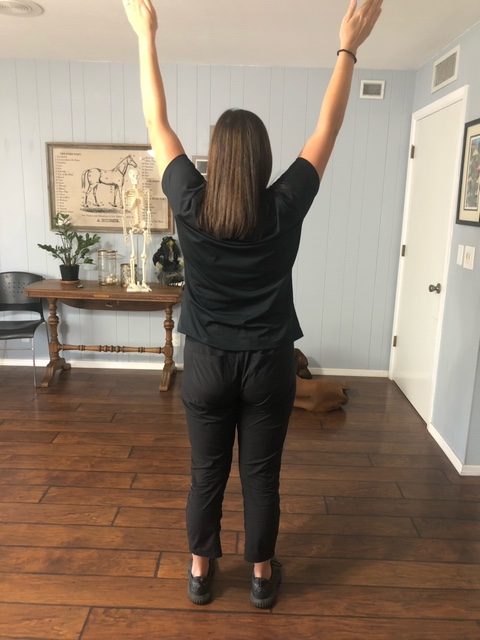
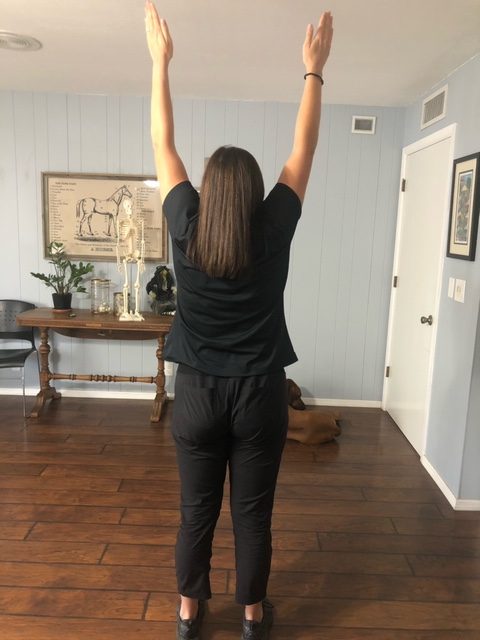
Start with your hands outstretched above your head and your shoulders in a “packed” position. Packing the shoulder means to bring the scapula together and down. A common form cue for packing the shoulder is to imagine you are trying to grab a pencil by pinching your shoulder blades together behind your back, and then try to put your shoulder blades in your back pockets by lowering them down your back. Of course, your shoulder blades won’t move all the way down your back, this is just what to think while in the start position.
From this position, extend your hands above your head by lifting your scapula. Imagine you are trying to touch your ears with your deltoids. Repeat for three sets of fifteen.
Corner stretch
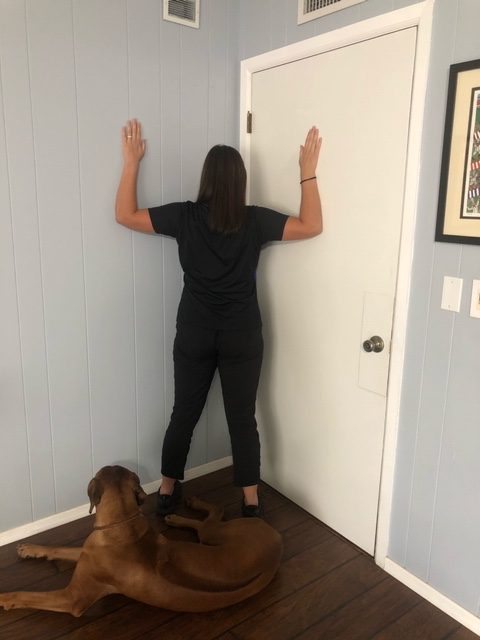
The corner stretch is a classic exercise for opening up the chest and relieving the tension we feel from sitting in front of our computers and phones all day. Place the hands on the wall with the elbows directly below them, as pictured above. Gently stretch into the wall, being careful to find a good position for the shoulders that is comfortable. You should feel a stretch across your chest and the front of your shoulders, but no pain. Release after about 15 seconds and repeat three times.
Hands on hips stretch
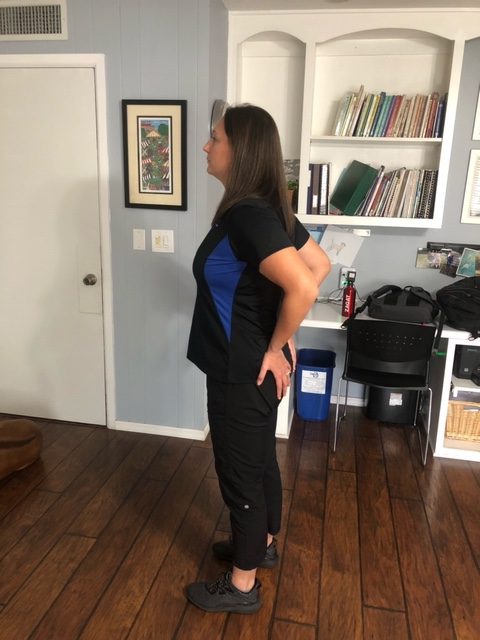
This exercise is similar to the corner stretch, but the leverage for the stretch comes from placing your hands on your hips. Place your hands on the backs of your hips, with your fingers pointed towards the ground. Press into your hips and retract your scapula while allowing a gentle stretch across the front part of your deltoid and upper chest.
3-part shrugs
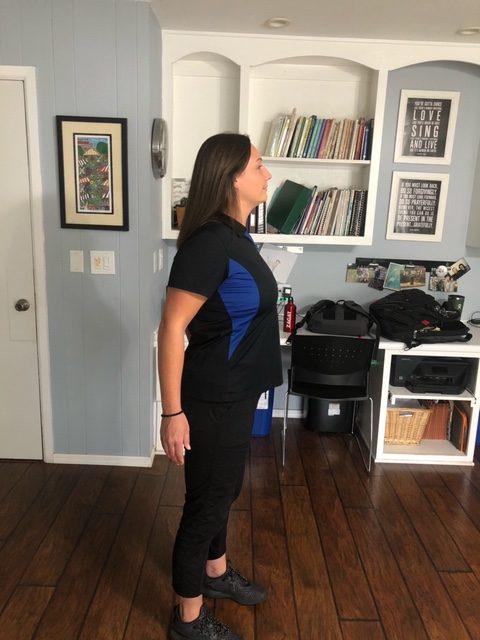
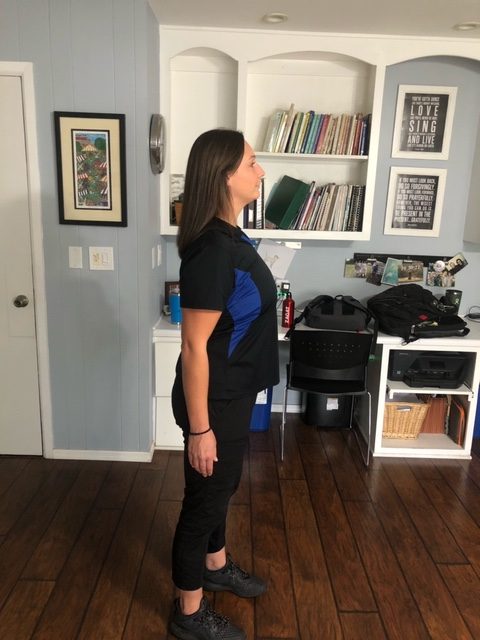
The three part shrug starts with your hands relaxed at your sides. Raise your shoulders up, while leaving your hands at your sides. Imagine trying to touch your shoulders to your ears. Then, retract the scapula in the same way you did for the scapular elevations. Imagine you are holding a pencil between your shoulder blades, and then drop the scapula back down into your back pockets, as you did in the first exercise. Repeat for three sets of 15 repetitions.
Kneeling shoulder / thoracic spine mobilizations
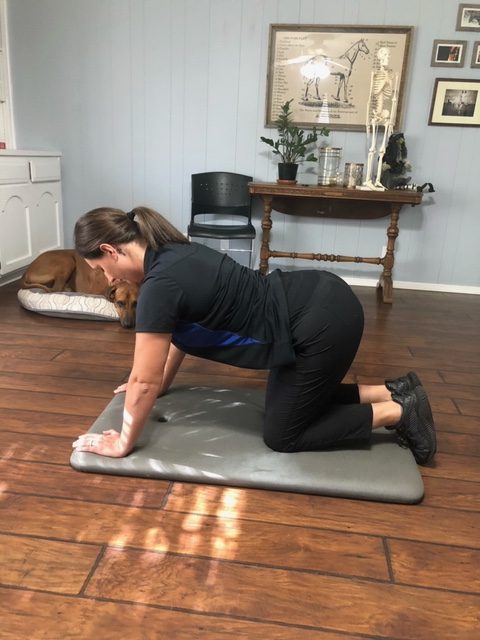
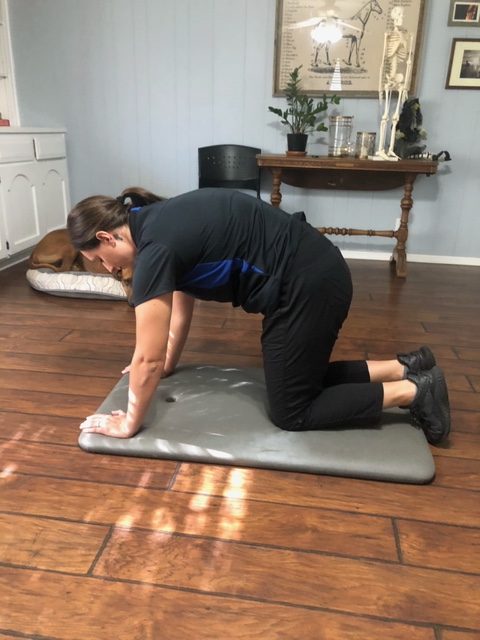
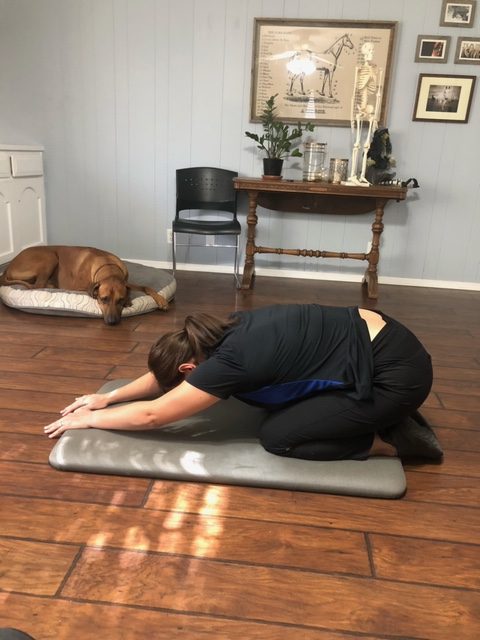
The four kneeling shoulder / thoracic spine mobilization starts with your hands and knees on the floor. You may want to use a yoga mat for comfort. To begin, extend your lower spine by creating a gentle arch down towards the floor, as in the first picture above. Gently begin pressing your spine up towards the ceiling in the classic “cat” yoga pose. From this position, begin to sit back onto your hips, while leaving the hands in position. Allow yourself to feel the gentle stretch in your shoulders and upper portion of your spine, blow your neck.
Chair press walk outs
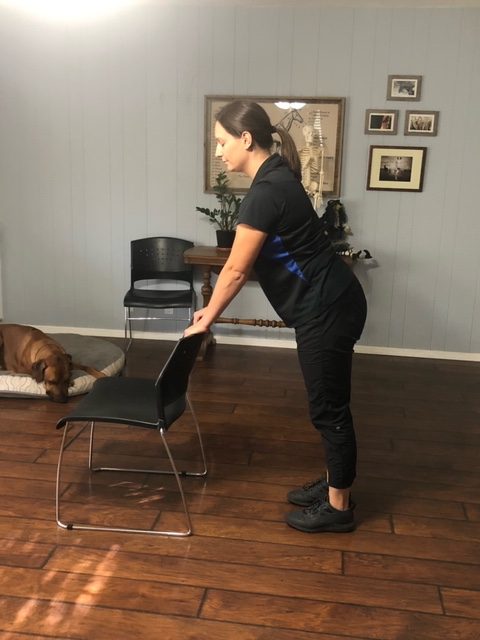
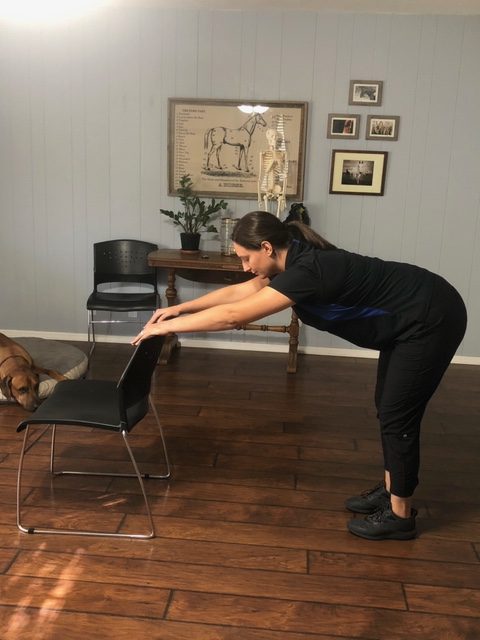
This stretch is similar to the four point thoracic spine mobilization above. Place your hands on the back of a chair and slowly walk your feet back until you feel the stretch. Hold for 15 seconds and repeat three times.
Supine thoracic spine mobilizations
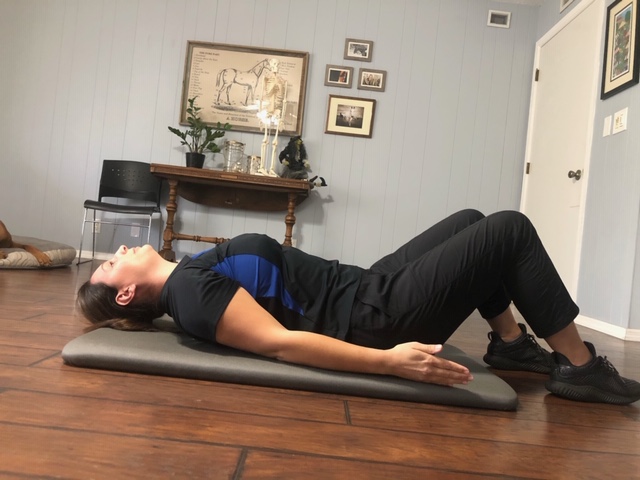
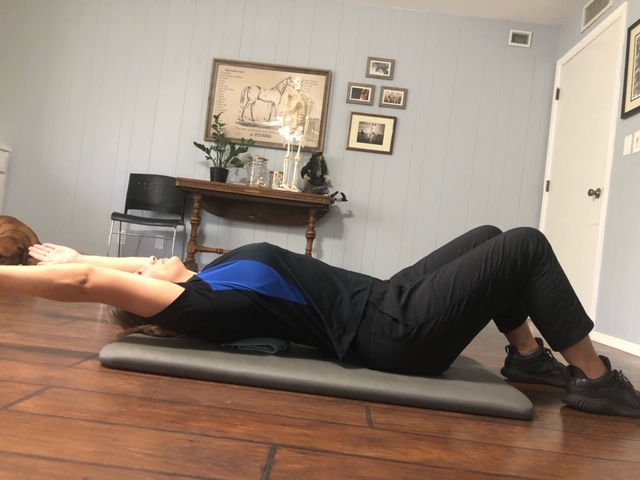
Lay on your back with your hands at your sides. Slowly raise your hands in front of you, keeping the arms straight in an arc motion. Continue the arc until your hands are above your head, fingers pointing at the wall behind you. Keep your plams facing each other the whole time, and then return to the start position. Hold the stretch for 15 seconds and repeat three times.
Functional press
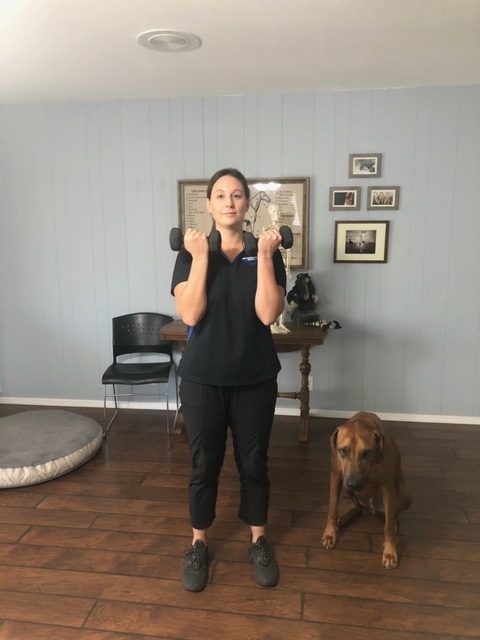
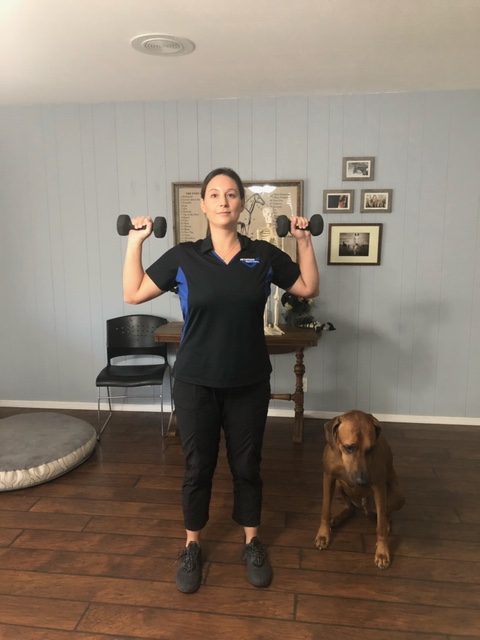
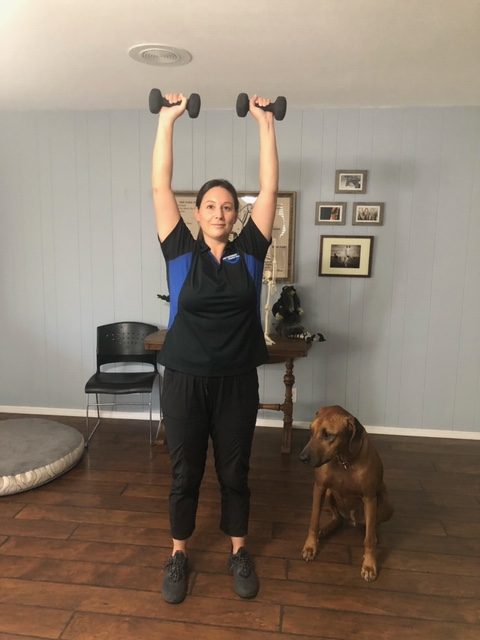
Those who are familiar with the gym will recognize this exercise as a variation of Arnold’s favorite pressing movement, the Arnold press. Use light dumbbells, or weights you’ve got around your house. You can also use milk jugs, a backpack loaded with a textbook, or anything to add a bit of resistance. Start with the dumbbells in front of you, with the ends touching, and your palms facing you. Rotate the shoulders outward until you hit a point where your elbows are directly to your sides, and then press the dumbbells overhead. You can choose to touch the dumbbells at the top if you want. Reverse the motion, bringing the dumbbells back down to your sides and them rotating them back in front of your face to complete the repetition. Complete three sets of 15 repetitions.
Banded internal and external rotations
The gym goers in the audience may recognize these classic exercises. If not, don’t worry. Use a band of some sort (if you don’t have any, they are cheap and easy to find on Amazon or at local sporting goods stores) and grab the band at shoulder width with your palms supinated (facing up). Externally rotate your shoulders, keeping your elbows as close to your sides as possible. You will feel tension in the posterior portion of your shoulder after a few repetitions.
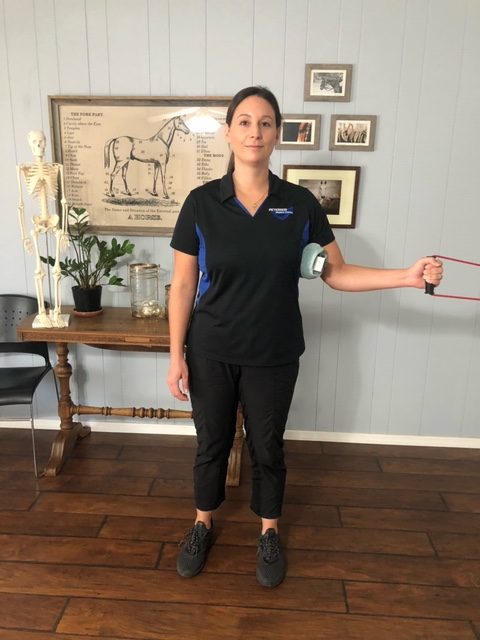
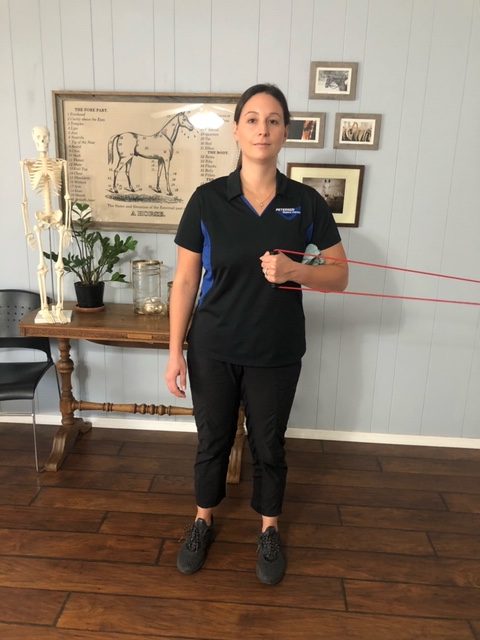
For internal rotations, you will complete the same motion, but with the resistance band facing the other way. Attach the resistance band to a doorknob or any anchor you can find, place a rolled up towel under your armpit, grab the band with one hand, and internally rotate the shoulder joint until your hand is directly in front of you. Remember to keep the elbow tucked to your side as much as possible. Repeat both exercises for three sets of 15 repetitions.
Shoulder flexion, extension T-band
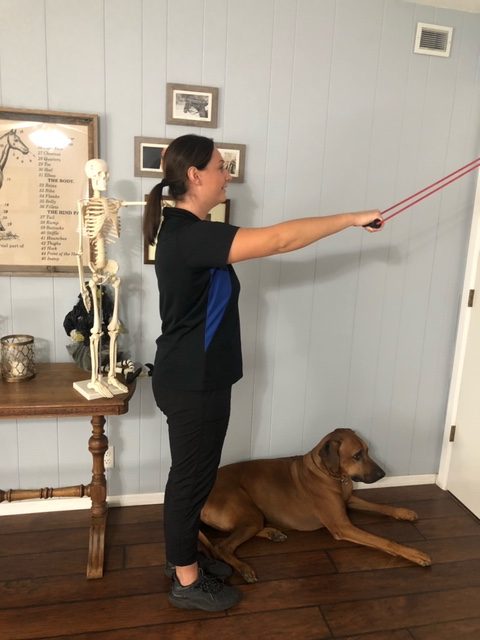
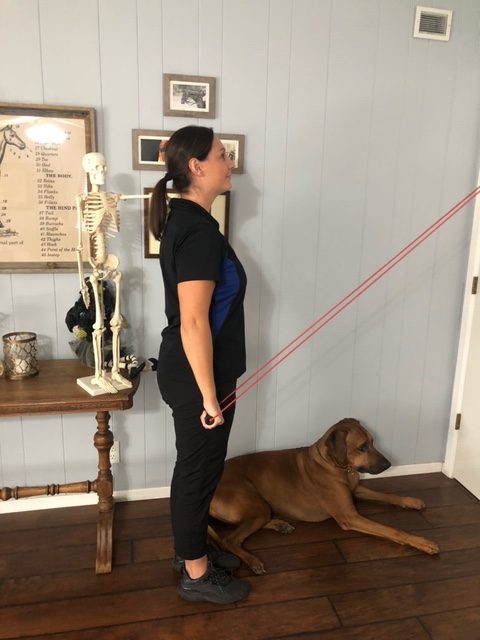
These two exercises can be done utilizing the same setup with the band from the internal and external rotations above. For the first exercise, fix one end of the band to the top of a doorway and stand back, with your hand directly in front of you for a good starting position. Keeping the arm straight, utilize your lat to pull the band down to hip level, as pictured above.
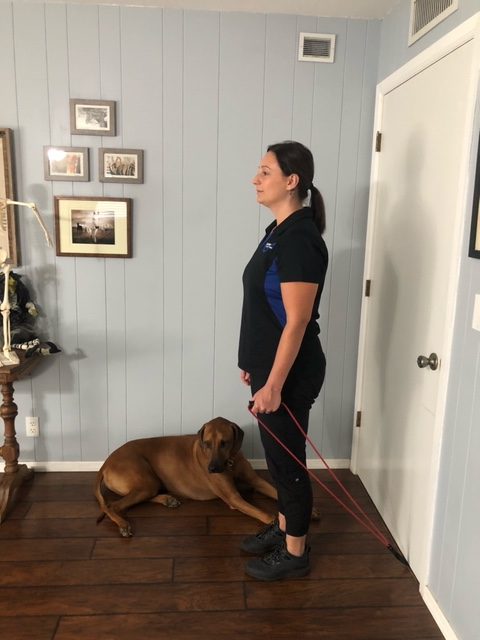
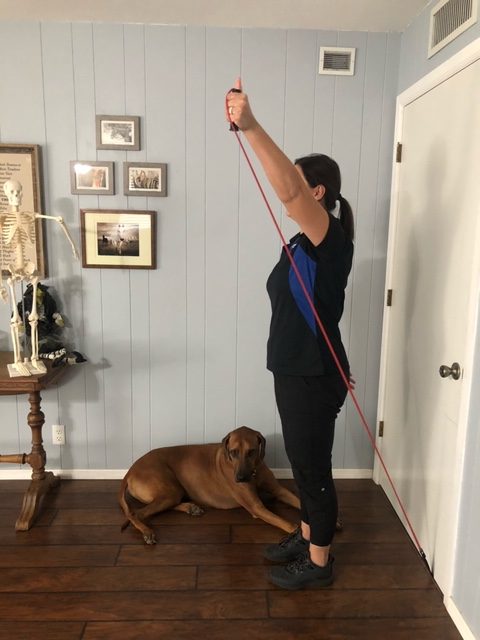
For shoulder extension, you will reverse the exercise mentioned above. Affix the band to the bottom of the door, and start with your hand directly to your side, with a slight bit of band tension at the bottom. Raise your hand directly in front of you, in an arc motion. You should feel tension in the front of your shoulder, which will be doing the work. Repeat both of the above exercises for three sets of 15 repetitions.
Final words and some things to avoid
As stated above, shoulder pain doesn’t have to be a part of your daily reality. We recommend completing these exercises 2-4 times per week. If you miss a session, don’t be too hard on yourself. Just pick up where you left off.
Some final words for some things to avoid while you are recovering from your shoulder pain:
- Repetitive or sustained overhead working
- Slump/forward head sitting posture
- Sleeping on your pain full side or with arms over your head
- Be careful with over head exercises or “upright rowing” exercise.
- Reaching out in from with lifting away from your body.
Good luck! We hope this helps you. If you continue to have shoulder pain or problems, please don’t hesitate to give us a call and as for an in person evaluation or Telehealth evaluation.
