What follows is a video Jeff Petersen shot with two different types of people – a very large / tall male and an average sized female. The topic is setting up an ergonomics chair for different sizes of people, and he also covers how to set up an ergonomic work chair. The chair used is a budget friendly chair, the Hyken ergonomic task chair from Staples, which cost about $159 at the time of this video. We will publish a full review of the chair within a few weeks. If you’d prefer to read, rather than watch, scroll down for a full transcript of the video.
Here’s the video!
The following is a transcript of the video above:
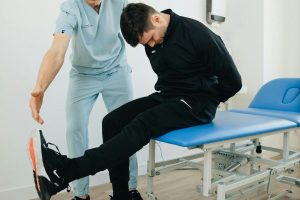
Hello, my name is Jeff Petersen. I’m with Petersen Physical Therapy. It’s been said that sitting is the new smoking. Now, I thought that vaping was the new smoking, but what do I know? Today what we’re going to do is we’re going to show you how to sit properly by setting up a budget friendly chair ergonomically correct for your body type. We’re going to use two different body types. So, let’s get going and I’ll show you how to do that.
Okay, so this is Jeremy – he’s a large male – and Lora is a perfectly heighted female. Today, you can see they’re both different sizes. We’re going to use them as our models. They’ve agreed to be in the videos to show what do we do when we have two diverse sizes, and how do we fit in the chair. So, we’re going to set up a chair. This is the Hyken Chair from Staples.
We’re using Jeremy as our first model and you can see he’s a large guy – he’s about 6′ 7″. Most people are going to sit in the chair just like this where they’re leaning back trying to be as comfortable as possible. So, there is a sequence to this. The first thing we want to set is the height of the chair. You can see Jeremy’s knee flexion here. He’s well beyond 90 and that’s too low. Jeremy, I want you to raise this chair and for you it’s probably going to go as high as it can go. Come all the way up and have a seat. Put your feet forward. Okay, so you can see now he’s at about 90. So for a guy Jeremy’s size, this chair is just about big enough. There are larger chairs, but like I said this is a budget-friendly chair. So, you start to get chairs larger than this is going to be more costly.
The next thing we want to look at is the lumbar support and the seat pan. You can see how right now the seat pan is tipping back. The seat pan is what he’s sitting on. There should be a lever on that left side to lock that. Lock that up. Now it’s locked so he’s up nice and tall. You do not want any tip of that seat pan because as his shoulders come back, his head’s going to come forward. Looking at the depth of the seat pan, I usually use two to four fingers – a minimum of two, maximum of about four. If you look at Jeremy, he is about that. He’s kind of a Vulcan sign away. Again, it’s acceptable – not ideal – but acceptable, particularly for budget. He is comfortable sitting there.
The idea is you can see he’s getting good weight distribution through the back of his hamstrings. Now, if he’s using this chair and his hamstrings are getting tired or he had a hamstring strain, then maybe we would want to get a larger seat pan.
The next thing we want to look at is the lumbar support. With this particular chair there’s not a lot of it. Most of these mesh chairs don’t have great lumbar support. If you could lean forward just a little bit. Okay, so that slides up just a little bit – hits him about in his lumbar spine. What we want is, most people have the chair too low and the lumbar support is hitting them below the belt line. You want to have the lumbar support above your belt line so it actually hits your back to give you support.
Then the next thing we want to look to adjust is his arm rests. This has adjustable armrests. These are the minimum adjustments you’d want to see in any chair. If you’re up nice and tall. We’re looking at his hands here. I’m going to just kind of play with the armrest. Now, I guess you’re up as high as you can. How’s that feel? Does that feel too high?
Jeremy: “Maybe a little bit bit yeah.“
Right there. The idea is you don’t want it shoving your shoulder up, but you don’t want to be reaching down. You’re not leaning on the armrest. You’re there just for some support, because ideally he’s going to have his keyboard right in front of him, and his mouse right here, and the monitor is going to be right in front of him too. We’re going to look at another model in front of the computer after we get done but this looks like a pretty good position for Jeremy. Like I said, the chair is a little small, but he’s a large guy and if your budget is you want to get a chair for under $200 this would be this would work just about right. You can see the seat pan might be a little bit small. He certainly doesn’t need a foot rest. He’s got good lumbar support, he’s able to keep his neck in a nice comfortable position.
One thing I want to show you with this particular model is it comes with a neck rest. With this particular neck rest – and I’m not a huge fan of any of the neck rests – but this particular neck rest mounts right here on the back of the chair. You can see it would hit him right between the shoulder blades, not in his neck at all. So what we’ve done for this video is we’ve taken the neck rest off and when I review this chair completely I’ll talk more about that.
If you want a written transcript about the sequence with which to go through in order to set up your chair, go to our website and we have it all typed out there.
This is Lora. She’s our second model.
We’re going to show you the difference. Now, we just set Jeremy up who is 6′ 7″ in the same chair and you can see that her feet don’t touch the floor. Her shoulders are a little bit elevated and she’s leaning forward in the chair. Again, this is a budget chair. It’s the Hyken Chair so it’s supposed to fit as many people as possible. What I want to do is go through the sequence of events. The first thing you set up in your chair is the height of your chair. Don’t worry about the height of the workstation yet.
Lora, we’re going to lower this so that your feet hit the floor. Now you can see her feet hit the floor and she’s got a little bit more than 90 degrees of knee flexion. Now, the one thing about this chair is you can see she doesn’t even have two fingers between the edge of the seat pan and her calf muscles. So this chair could create some difficulty and discomfort in Lora if she’s going to use it. One way to adjust that – we’re going to use … I’m going to make him sit without the pillow. Let’s have a seat. We could elevate her a little bit in the seat first and you can see it gives her a little bit of clearance under here because the seat pan slopes down. The one caveat is if you’re using a chair and you elevate it like this and you start to get some discomfort in your hamstrings or your calves, then you want to make sure you get a smaller chair. With the elevation we might even want to come down just a little bit more and that’s as low as it can go. The other the other thing that we can work on with her if needed is we would use a foot rest.
Now you can see she’s got some space. That’s when you’d want to use a foot rest – when the chair is too high and you want to make sure your feet are solidly on the floor.
Then the next thing we look at – we already have this locked out – so she’s up nice and tall. I want to point something out to you. She’s 5′ 1″, Jeremy is 6′ 7″, and yet both of them have the lumbar support in the highest position. Eight out of 10 people, in your chair, you want to make sure the lumbar support is probably in the highest position. Most people have it too low.
The next thing we want to look at, there’s no tilt in the in the lumbar support and we want to look at the arms. You can see she’s drifting down a little bit because her arms aren’t quite as long as Jeremy’s. Again, this one might be a little big for her but not too bad. How’s that?
Just a tad low, but within that acceptable range. You can see it’s a little bit higher because she’s on the cushion. The other thing I wanted to talk to you about, and we’re going to show you this at her workstation, is where do you put the computer monitor. You wear glasses, are they bifocals?
Lora: “Yes.“
Do you wear them on the computer?
Lora: “Yes.”
Okay, so you want to be looking at the top third of the computer. This is what we call your personal space. What I like to tell Lora is you want the computer to be, you keep that hand right there, and we’ll let the camera see us. You want that monitor at your personal space. When I’m here it feels a little close, doesn’t it?
Lora: “Yeah.“
Not so close that you’d call the cops, but close enough that you’re uncomfortable.
Lora: “Right.”
Yes. So we all know a close speaker. What happens is it forces you to come up nice and tall. So that’s where the monitor wants to be is right at the edge of your personal space, provided you can see it clearly with whatever glasses or contacts that you have. Then you want to really make sure that your mouse and your keyboard are here. So Lora’s … this chair is just a little bit too too low for Lora, but she’s a really good typist. She can type here and mouse here. So for the smaller person, this chair might not be great.
Now we’re going to show you how to sit at the computer and this is a workstation that I’ve set up for me if you notice the chair is a little bit high because of the height of the workstation. I am using a foot rest. I don’t know if you can see that, but the key is I want to make sure that I’m sitting up nice and tall. I’m as close as I can be. I’m not reaching for the mouse, I’m not reaching for the keyboard. The edge of the monitors, where they come in, it’s a little bit further away, but the edge should be within an inch or so of my personal space. It’s a little bit further because of my vision and I need to wear glasses. But the most important thing is to make sure that I’m not reaching to work on the keyboard, I’m not reaching to work on the mouse, and I’m able to have some good lumbar support. My feet are supported with with the foot rest while I’m typing.
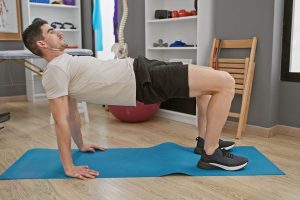
Obviously, sitting can be really challenging, so you want to make sure you’re getting up every hour. In the past we have published some of what we call postural interruption exercises as a way to get up and stretch out and move around.
If this is helpful information please like, subscribe, give us some comments, offer us some suggestions, and smash the button. Apparently there’s a button there for you guys to smash so keep smashing it!
If you found the video (or transcript helpful), be sure to subscribe to our YouTube Channel and leave us a comment!