There’s a reason that gym goers have nicknamed their legs “wheels”. Your legs (up to and including your glutes) are what get you around day to day! This is why we have chosen to cover the lower body as part two of our “micro workouts” series.
Few things will have as profound an effect on our level of function, health, and full body strength as having basic strength in the legs and glutes. Additionally, strengthening the legs is one of the best ways to decrease our risk of injuries, falls, and many forms of chronic pain.
In just a few minutes a day, we’re going to show you how to build and maintain a basic level of strength in the lower body. This micro-workout, pairs well with the core strength micro workout from last month. You can do them at different parts of the day, or in succession.
Note: The beginning of this article will cover some of the background information on the value of strong legs. To skip directly to the exercises, click here. To skip directly to the workout, click here.
Don’t overlook the value of strong legs
While it’s common to espouse the virtues of extra core work, the connection between a strong core and strong legs often goes overlooked. The core and the legs are supposed to work together!
Think about it – picking up an object off the ground is mostly completed by the glutes and hamstrings, while the core musculature and lower spinal erectors contract to maintain a good spinal position. If these muscles are weak, then our body has no choice but to let our lower back take the brunt of the load.
It’s one of the many reasons that our desk jockey culture is rife with lower back problems and bad knees. Additionally, becoming stronger tends to improve flexibility, not the other way around.
Consider the following facts about your lower body musculature:
- The glutes are the largest muscle in the human body. They are also the strongest muscle in the body that acts against gravity. Strong glutes keep the trunk of the body in an erect posture and assist in “level changes” such as standing up from a chair or going up and down stairs.
- The quadriceps are among the strongest and largest muscles in the body. They assist you in all sorts of daily activities – walking, running, jumping, standing from a seated position, etc.
- The hamstrings are huge muscles that also cross the hip and knee joint. They are responsible for straightening the hip (standing up, bending over to retrieve something off the ground, jumping) as well as flexing the knee joint (running, walking, hiking).
- The calf muscles (gastrocnemius, soleus, etc) are primarily responsible for increasing the angle between the foot and lower leg, and are therefore critical in actions such as walking, running, and maintaining balance.
Notice the activities mentioned above – walking, standing up, running, picking up objects off the floor. If our leg muscles are weak, we are be bound to have problems with these activities down the road. It’s a small wonder why many common back, knee, hip, and ankle problems are linked to lack of strength in the legs.
How this Workout Works
The lower body muscles are large and strong – capable of holding our bodyweight up for hours at a time or walking / running for long periods of time. This obviously presents a challenge when attempting to work the legs quickly, without any equipment.
During this workout, we will rely on utilizing high reps of multiple exercises without a break to create fatigue in the lower limbs and stimulate a basic strength adaptation.
One caveat – don’t do these exercises to failure. As with the core strength micro workout, this workout is intended to be relatively easy and completed almost every day. If your form breaks down, you are done!
Don’t make yourself extremely sore trying to complete an arbitrary number of repetitions. Avoid the temptation to go “beast mode” and you’ll be OK.
Lunges and Squats!
You’d be hard-pressed to find a better pairing of exercises for the legs. Both exercises work the entire low body as a unit and will bring up the strength of all the large muscles mentioned above.
Exercise 1: Walking Lunges (or Reverse Lunges)
The walking lunge is one of the simplest and most effective exercises at working the entire lower body as a unit. It is the more difficult of the two exercises, and therefore we will be doing it first. It will build the quads, hamstrings, and glutes simultaneously, while also developing the often-overlooked musculature of the calves and feet.
If you’ve got space, use the walking lunge. If you’re in a confined space, such as an office, use a reverse lunge instead. Focus on stepping directly in front of your body, with a straight foot, and then bend the front knee until your thigh is roughly parallel with the ground. Personally, I like to GENTLY tap my bottom knee on the ground as I do the exercise. This is because I feel the greatest stretch in my hips in this position. If you’re new to lunges, do not do this at first. Don’t smash your kneecaps on the ground in the name of building stronger legs. Just go down until your bottom knee is roughly an inch off the ground.

As you get stronger and improve your ability to control your body’s weight in the bottom position, feel free to experiment with knee positioning and step length. As a general rule, longer steps will emphasize the hamstring more, whereas shorter steps will emphasize the quads more.
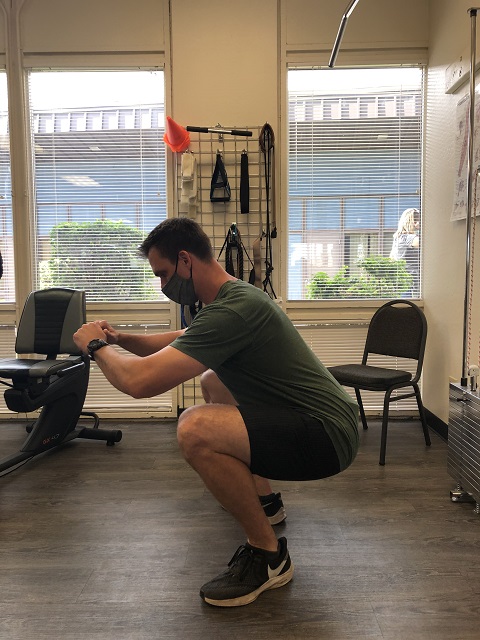
Exercise 2: Squats
Squats are a fundamental human movement; many people argue that they are the cornerstone of a strong body. Since bodyweight squats on their own are a fairly easy exercise, we will do them last in this workout, directly after the lunges, when our legs are already feeling some fatigue.
Place your heels roughly shoulder-width apart (or slightly wider). Turn your toes out about 15 degrees on either side. As you do the exercise, play with the foot width until you find a position that is comfortable for your hips. Don’t try to force your hips into a position they are not designed for, just so your squat looks like someone else’s.
Focus on keeping your weight even between your heels and the balls of your feet. Don’t bias your weight to the front or back.
Go as low as possible while remaining balanced and maintaining the natural curve of your spine. If you feel the temptation to lift your heels off the ground, lift your toes off the ground, or curve your low back, you are at the bottom of the rep.
The depth of the squat will vary from person to person based on their individual mobility and strength. Expect your mobility to improve over the course of weeks as you complete these reps.
The Program
Similar to our core strength micro workout, this workout will take place over the course of a few minutes and will utilize the principle of progressive overload utilizing a scheme called step loading. If you’re unsure what that means, go back and read the first micro-workout post before returning to this one.
The difference here is that there are no breaks. Move from the first exercise for a single set and then immediately start the second one. Keep moving until you’re done, taking 5-10 second breaks as needed. I’m usually able to get this done in about two and a half to three minutes. At the end of the set, you will likely be breathing heavily, but not sweating.
If you’re starting from scratch, go slow and take your time. We recommend the following progression week-to-week, completing the same workout about 5 times before moving to the next level.
| Week 1 | Week 2 | Week 3 |
| 5 lunges per leg 5 squats | 8 lunges per leg 8 squats | 10 lunges per leg 10 squats |
| Week 4 | Week 5 | Week 6 |
| 12 lunges per leg 12 squats | 15 lunges per leg 15 squats | 18 lunges per leg 18 squats |
| Week 7 | Week 8 | Week 9 |
| 20 lunges per leg 20 squats | 25 lunges per leg 25 squats | 30 lunges per leg 30 squats |
Do this routine 3-5 times per week. We do not recommend that you complete this 7 days per week, like the core routine. The legs need time to recover, and these exercises utilize big muscles in the lower body. Starting with 3 days per week should be just fine in the beginning. If you can work up to doing this every weekday (taking the weekends off), then you are a beast! If you make it through the entire 9 weeks, you’ll be doing 90 reps per workout, in the course of a few minutes! Not too shabby!
A note on muscle soreness and rest days
If you’re just starting out, full range of motion lunges and squats may produce quite a lot of delayed-onset muscle soreness (DOMS) in your legs. DOMS is typically a result of “novel stimulus” to the muscles, aka doing an exercise you’re not used to doing. Contrary to popular belief, soreness has nothing to do with the quality of the workout, and it has nothing to do with lactic acid. Large muscles like quadriceps and hamstrings are particularly susceptible to this type of soreness. Lunges are also infamous for creating soreness in the glutes.
The workout starts intentionally easy, with just five reps per exercise (15 total repetitions). Ideally, spending the first week doing just a few reps per day will help you avoid getting very sore in the beginning. However, we recommend that you be smart about it. If at any point you’re very sore, take a day off between sessions. If this is the case, doing the workout three days per week (Monday, Wednesday, Friday) may be the best option. Rest assured that within a week or two, the soreness from this style of workout will subside. The key is to stick with it.
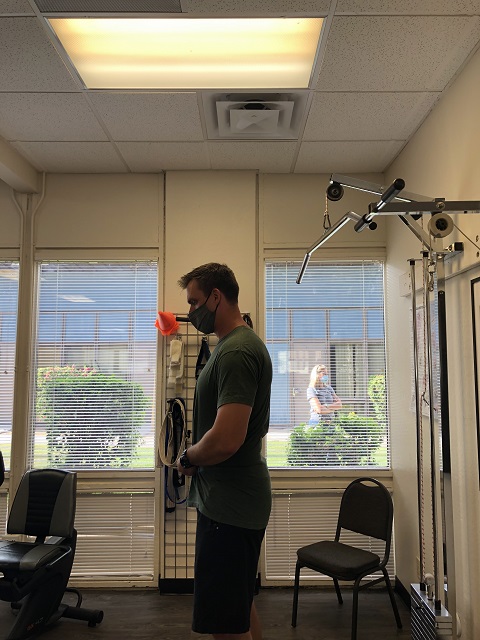
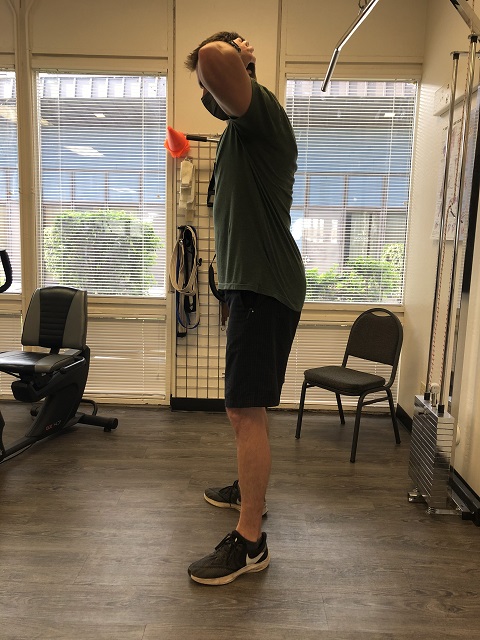
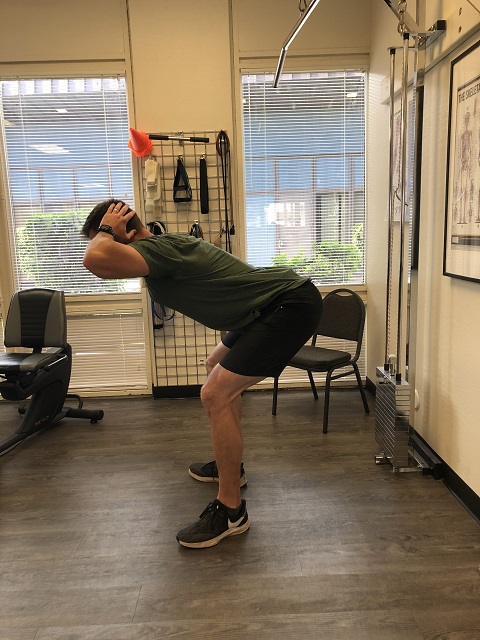
Bonus Exercise: Good Mornings!
You didn’t think we’d end this article without a bonus exercise, did you? Since the two exercises listed above tend to be quad-dominant, feel free to add a bodyweight good morning at the end for extra hamstring and glute work. Place your hands behind your head and start in the same neutral spinal position you did for your squats. Bend the knees slightly but maintain a vertical shin as you bend over, keeping a neutral spine. Go down until you feel your hamstrings at their most stretched position, and then spread the floor with your feet to snap back to the top. Repeat this exercise for as many repetitions as you did for the main movements (for instance, if you did 15 lunges per leg and 15 squats, then do 15 good mornings).
Next Steps
Feel free to play around with this workout and make it your own. In the beginning, we recommend that you stick to the program until you know how you’re going to respond. In the words of legendary strength coach Jim Wendler, “Start too easy and progress slowly.”
Trust the process and you will notice significant improvements in your ability to lift heavy objects, maintain your balance, climb stairs, etc. After a few months, you will notice a significant improvement in muscle definition in the thighs and glutes as well, as long as you’re also working to maintain a healthy body fat level.
If you’ve been doing this for a while and want to continue to challenge yourself, feel free to sub out the exercises for more challenging ones. For instance, you could:
- Replace the lunges with rear foot elevated split squats (also known as Bulgarian split squats)
- Replace the squats with jump squats (or goblet squats)
- Replace good mornings with a light kettlebell or dumbbell swing
The idea is that the first exercise is a single leg (unilateral) exercise, the second exercise is a squat, and the third exercise is a hamstring dominant hip hinge.
If you are planning to do these micro workouts in succession with our core workout, I recommend going right from the core workout to the leg workout, in that order. Of course, you can switch that order if you like. However, I’ve personally found that core work like planks serves as a fantastic warmup for leg work, as you’ll be engaging your glutes, quads, and hamstrings while holding the plank positions.
Good luck! For more content, continue to check back with our physical therapy blog, and feel free to contact us if you have questions or suggestions!